As an angler, you’re always on the lookout for techniques that can take your fishing experience to the next level, and the wacky rig might be just the answer. This post is dedicated to exploring the intricacies of the wacky rig method – why you should use it, when to use it, how to set it up, and which budget brands are solid investments to get you well on your way to catching more bass.
Why Use a Wacky Rig?
The reason to use a wacky rig is pretty simple, it is honestly a cheat code when it comes to bass fishing. It catches numbers, size, and somedays it feels like you could catch fish blindfolded when using a wacky rig. Listed below are just a few reasons why the wacky rig is such an effective tool to keep in your arsenal:
- Efficiency: As stated above, using a wacky rig during the warmer months of bass fishing is a one way ticket to ripping lips and catching bass. They seem to go absolutely nuts for it, and on days where nothing else is getting fish to bite, the wacky rig is always a fail safe on landing a few fish.
- Versatility: Whether you’re fishing in clear, murky, shallow, or deep waters, the wacky rig technique can adapt to a variety of scenarios. By simply switching colors or your tackle used, there are a variety of ways to make a wacky rig fish to almost any situation.
- Simplicity: The method is remarkably easy to master. This simplicity makes it an excellent starting point for those new to bass fishing. You chuck it out in the water, hop it, and let it sink. That’s it. Unlike many lures like a spinnerbait or crankbait, there aren’t a ton of retrieves that you need to adopt and use.
- Budget-Friendly: You don’t need high-end equipment to use the wacky rig. Many effective setups are surprisingly affordable, yet they yield fantastic results. The baits themselves? You can buy a variety of stick worms that will cater to any water quality and situation, and still spend under $30. Unlike a single crankbait that can cost over $10, you can buy a pack of hooks and a couple backs of worms and catch a ton of fish.
When to Use a Wacky Rig?
The effectiveness of the wacky rig depends largely on the timing of its use. Here’s a quick rundown of the best times to deploy this method:
- During Spawn: Bass are fiercely territorial during the spawning season. A wacky rig lure bouncing around the nest will often be attacked out of instinct. I won’t encourage or discourage bed fishing, as I can see both sides. I do know, however, that a wacky rig often works when other lures don’t.
- Post-Spawn: After spawning, bass are typically tired and picky about their meals. The wounded baitfish imitation of the wacky rig is often too enticing for them to resist.
- Summertime: During the hot summer days, bass tend to be less active and more interested in easy meals. A wacky-rigged worm slowly sinking nearby is often irresistible. In my opinion, this is when the wacky rig really shines. It seems like in the dog days of summer and when all else fails, a wacky rig gets bit.
- Clear Water: In clear water, the slow, realistic movement of a wacky rig lure can attract bass from a considerable distance.
- Fishing Around Cover: Bass often lurk around structures like docks, weeds, and fallen trees. A wacky rig can be accurately tossed into these locations, offering an irresistible meal to any hiding bass.
In reality, the only time you shouldn’t be picking up a wacky rig is when the water is below 55-60 degrees in my opinion. Once the water gets above that temperature range, it is typically game on in my experience and you should never discredit the wacky rig.
Choosing Wacky Rig COlors
Much like everything else in bass fishing, there are about a million options when it comes to selecting colors for soft plastics. I have a very simple system for colors in wacky rig fishing, and that is keeping it to roughly three colors.
- Green Pumpkin: Green pumpkin is perhaps the most versatile and effective colors in all of bass fishing. It’s a great choice for fishing in most conditions due to its natural, earthy tone that mimics the colors of many creatures bass feed on. If the water is clear or mostly clear, throw green pumpkin – that easy!
- Watermelon: Watermelon is another excellent choice for clear water conditions. This lighter, more translucent green can mimic a variety of bass foods like baitfish and crawfish. It’s especially effective in bodies of water with a lot of vegetation. When the sun is bright, and the water clarity is high, a watermelon-colored bait can outperform others due to its less intrusive appearance.
- Black Blue/Purple: Unlike green pumpkin and watermelon, black & blue is a go-to color for stained to muddy waters. In these conditions, visibility is low, and bass rely more on their lateral line to detect movement in the water. The high contrast between the black and blue makes the bait stand out, which can trigger more strikes.
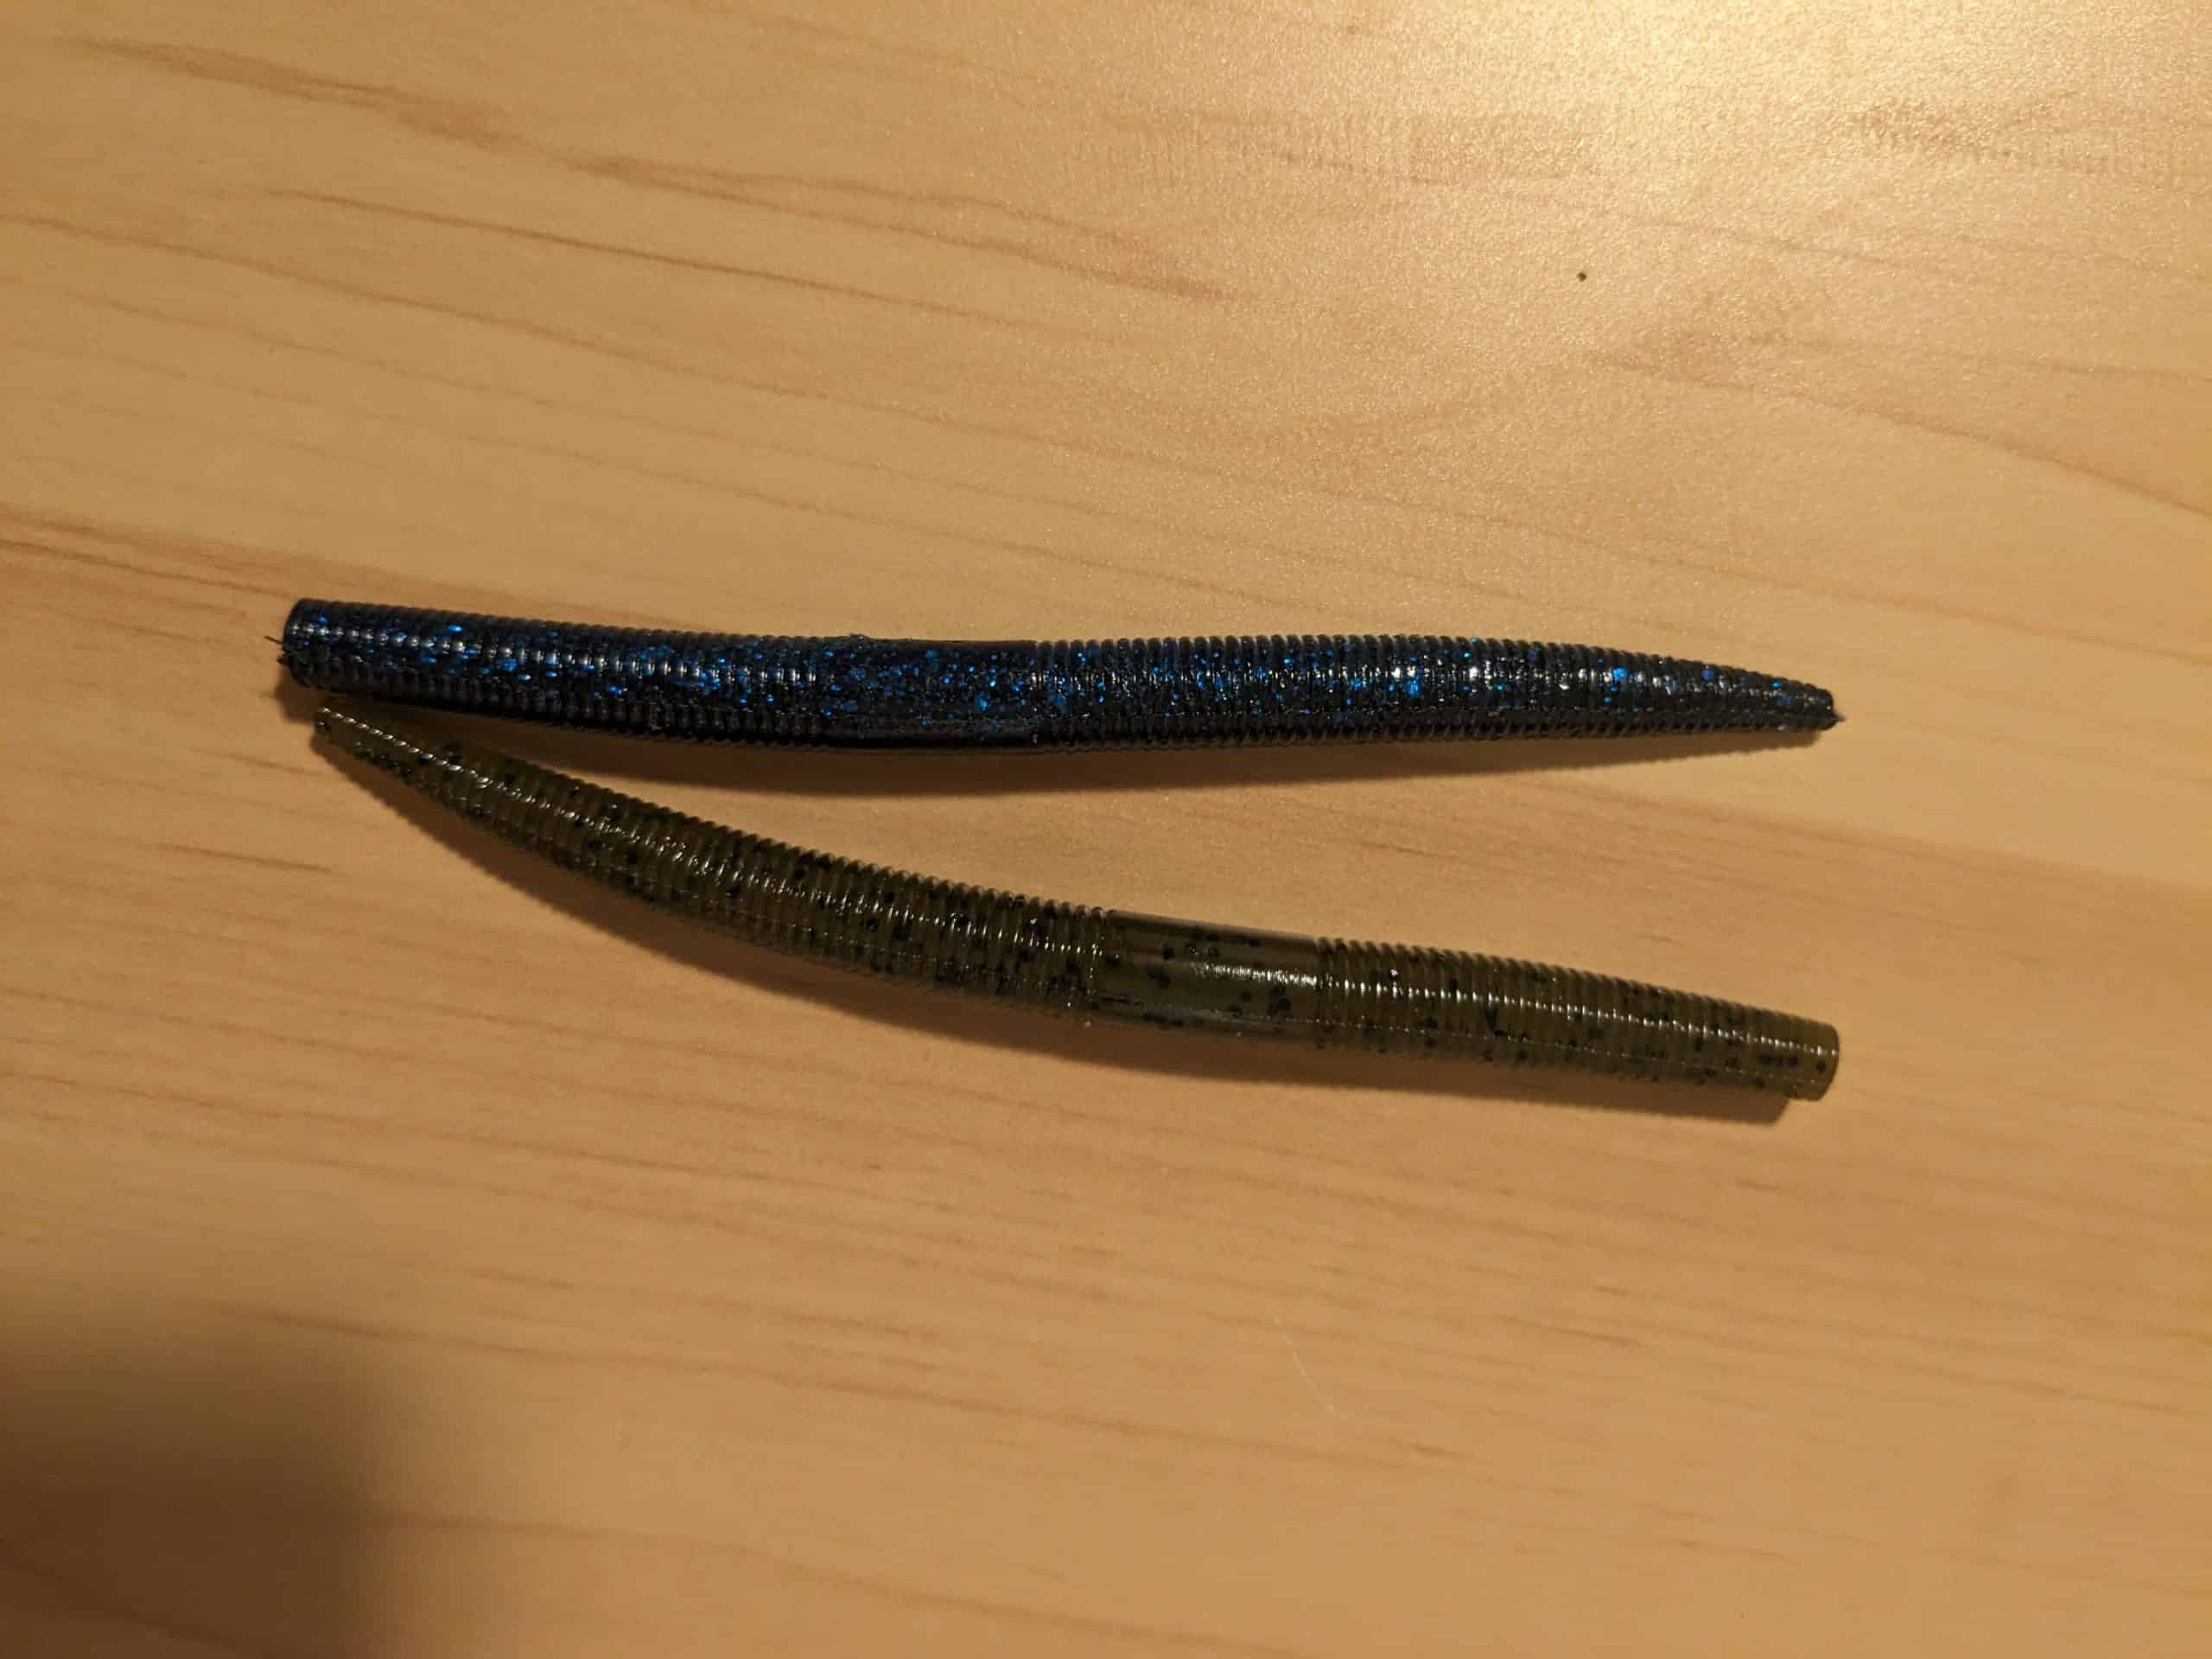
In short, in clear water use a green pumpkin or watermelon worm, in muddy or stained water use a black & blue color worm. Those three colors will cover 95% of the situations you will come against, don’t waste your time like me trying every color under the sun. While it is always fun to experiment, it also can put a hurting to your pocket book.
How to Rig And Fish a Wacky Rig
In reality, this doesn’t even need to be it’s own section. Rigging a wacky rig setup is just about as simple as it can get, but below are a few tips that will help you get more fish catches out of your worms.
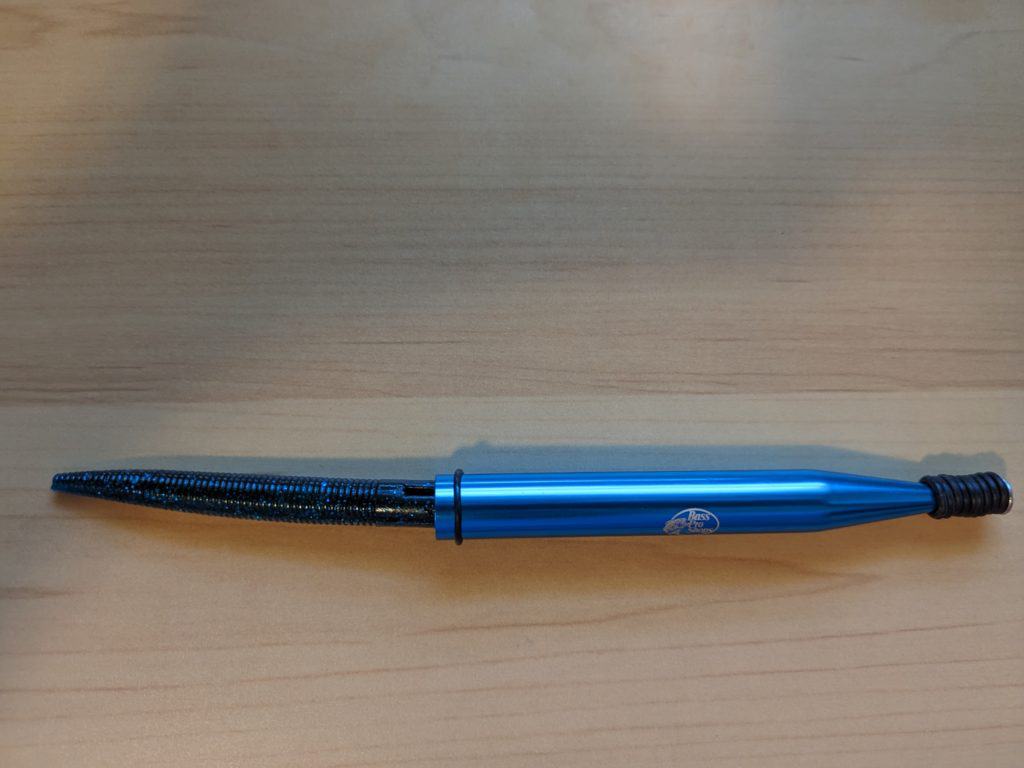
Use a Wacky rigging tool to extend the life out of your bait. You can buy these at Walmart, Tackle Warehouse, or just about any tackle shop. The one I have in particular is from Tackle Warehouse and was a whopping $6. Along with the tool, you will want to pick up some o-rings, which are only a couple of bucks and can last quite a while. If you don’t have the tool, you can still use the wacky rig. You will just stick the hook through the worm itself, which will tend for you to lose worms at a much quicker rate.
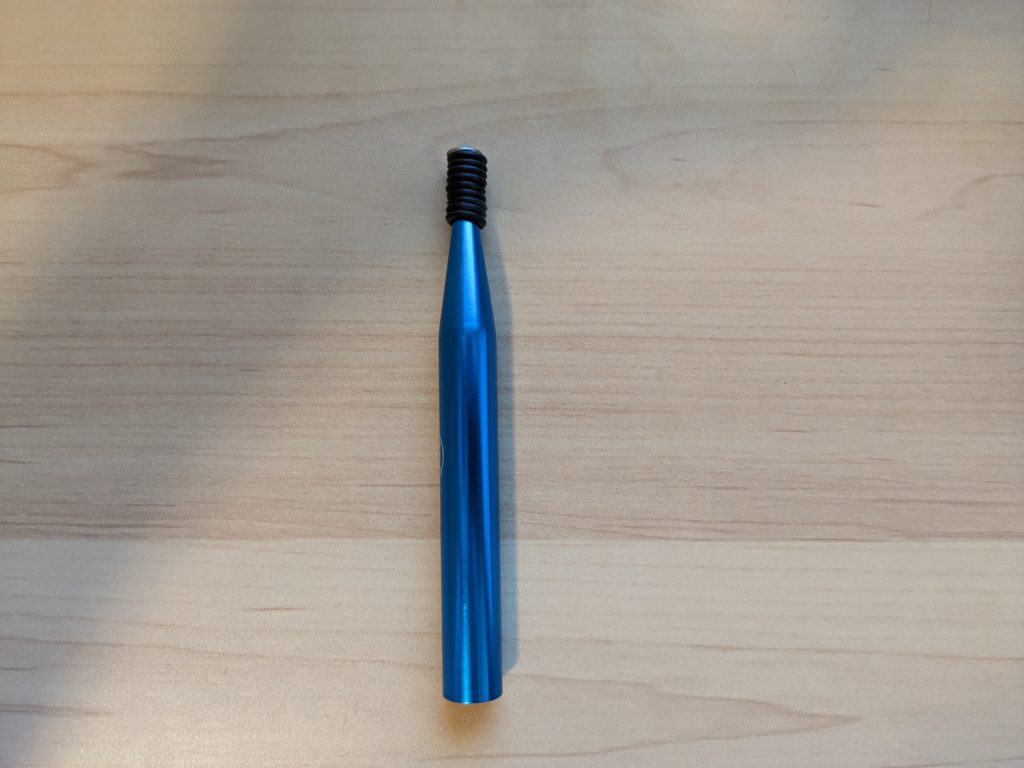
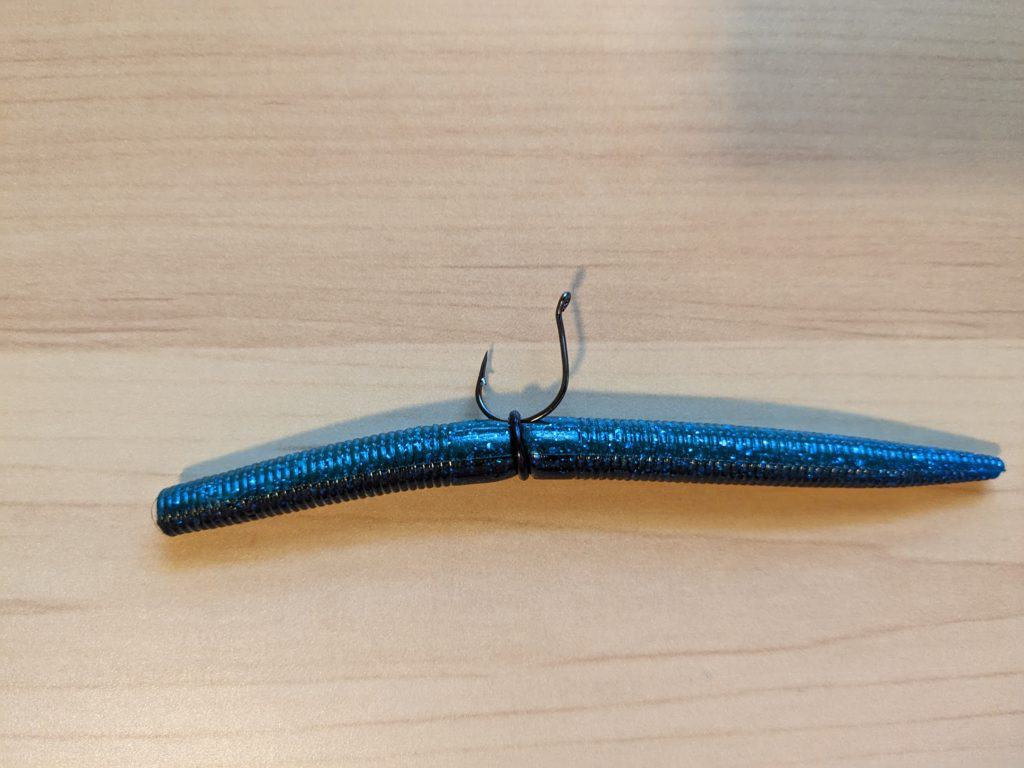
- Thread your worm into the tool approximately halfway, and slide an o-ring down to the end of the tool. When you eyeball it to be about right, slide the o-ring from the tool on to the worm.
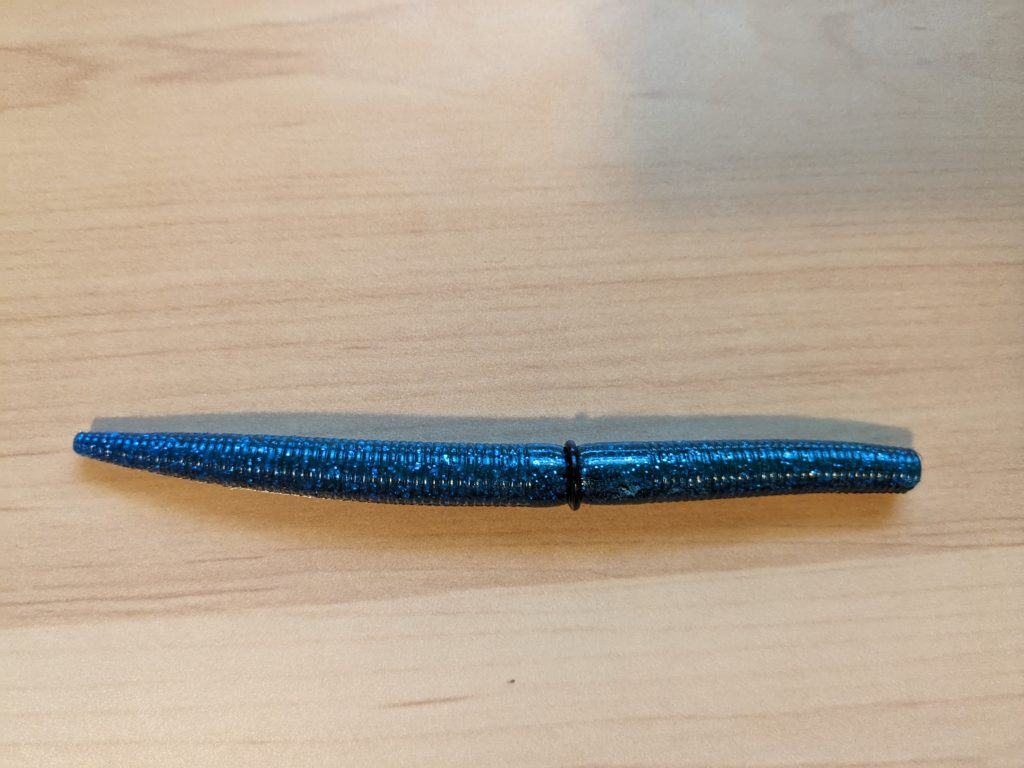
2. Now that you have the o-ring onto the worm, you simply stick your hook through the o-ring, and not the plastic itself. That’s it, your wacky rig is now ready to fish. I told you it couldn’t get simpler.
How to Fish a Wacky Rig
As mentioned above, fishing a wacky rig is easy as pie. Simply cast out to a specific location and let it sink. Periodically pop your bait much like you would a jig, and slowly retrieve it back to yourself. Typically, you will get the bite when the bait is falling back towards the bottom. As a tip, constantly watch your line for movement. Fishing a wacky rig is prone to gut hooking more bass, as they often swallow it before you even feel a bite. If you are attentive of your line while fishing, that will go down significantly and lead to a better fishing experience for you and the bass.
Wacky Rig Setups and Gear
The great part about wacky rig fishing is that it is simple all the way around. You don’t need fancy gear or tackle to fish a wacky rig, and the info below will break down some options that almost every angler will have at their disposal. If you are looking for some nice rod and reel setups that don’t break the bank, boy do I have the article for you.
- Gear Breakdown
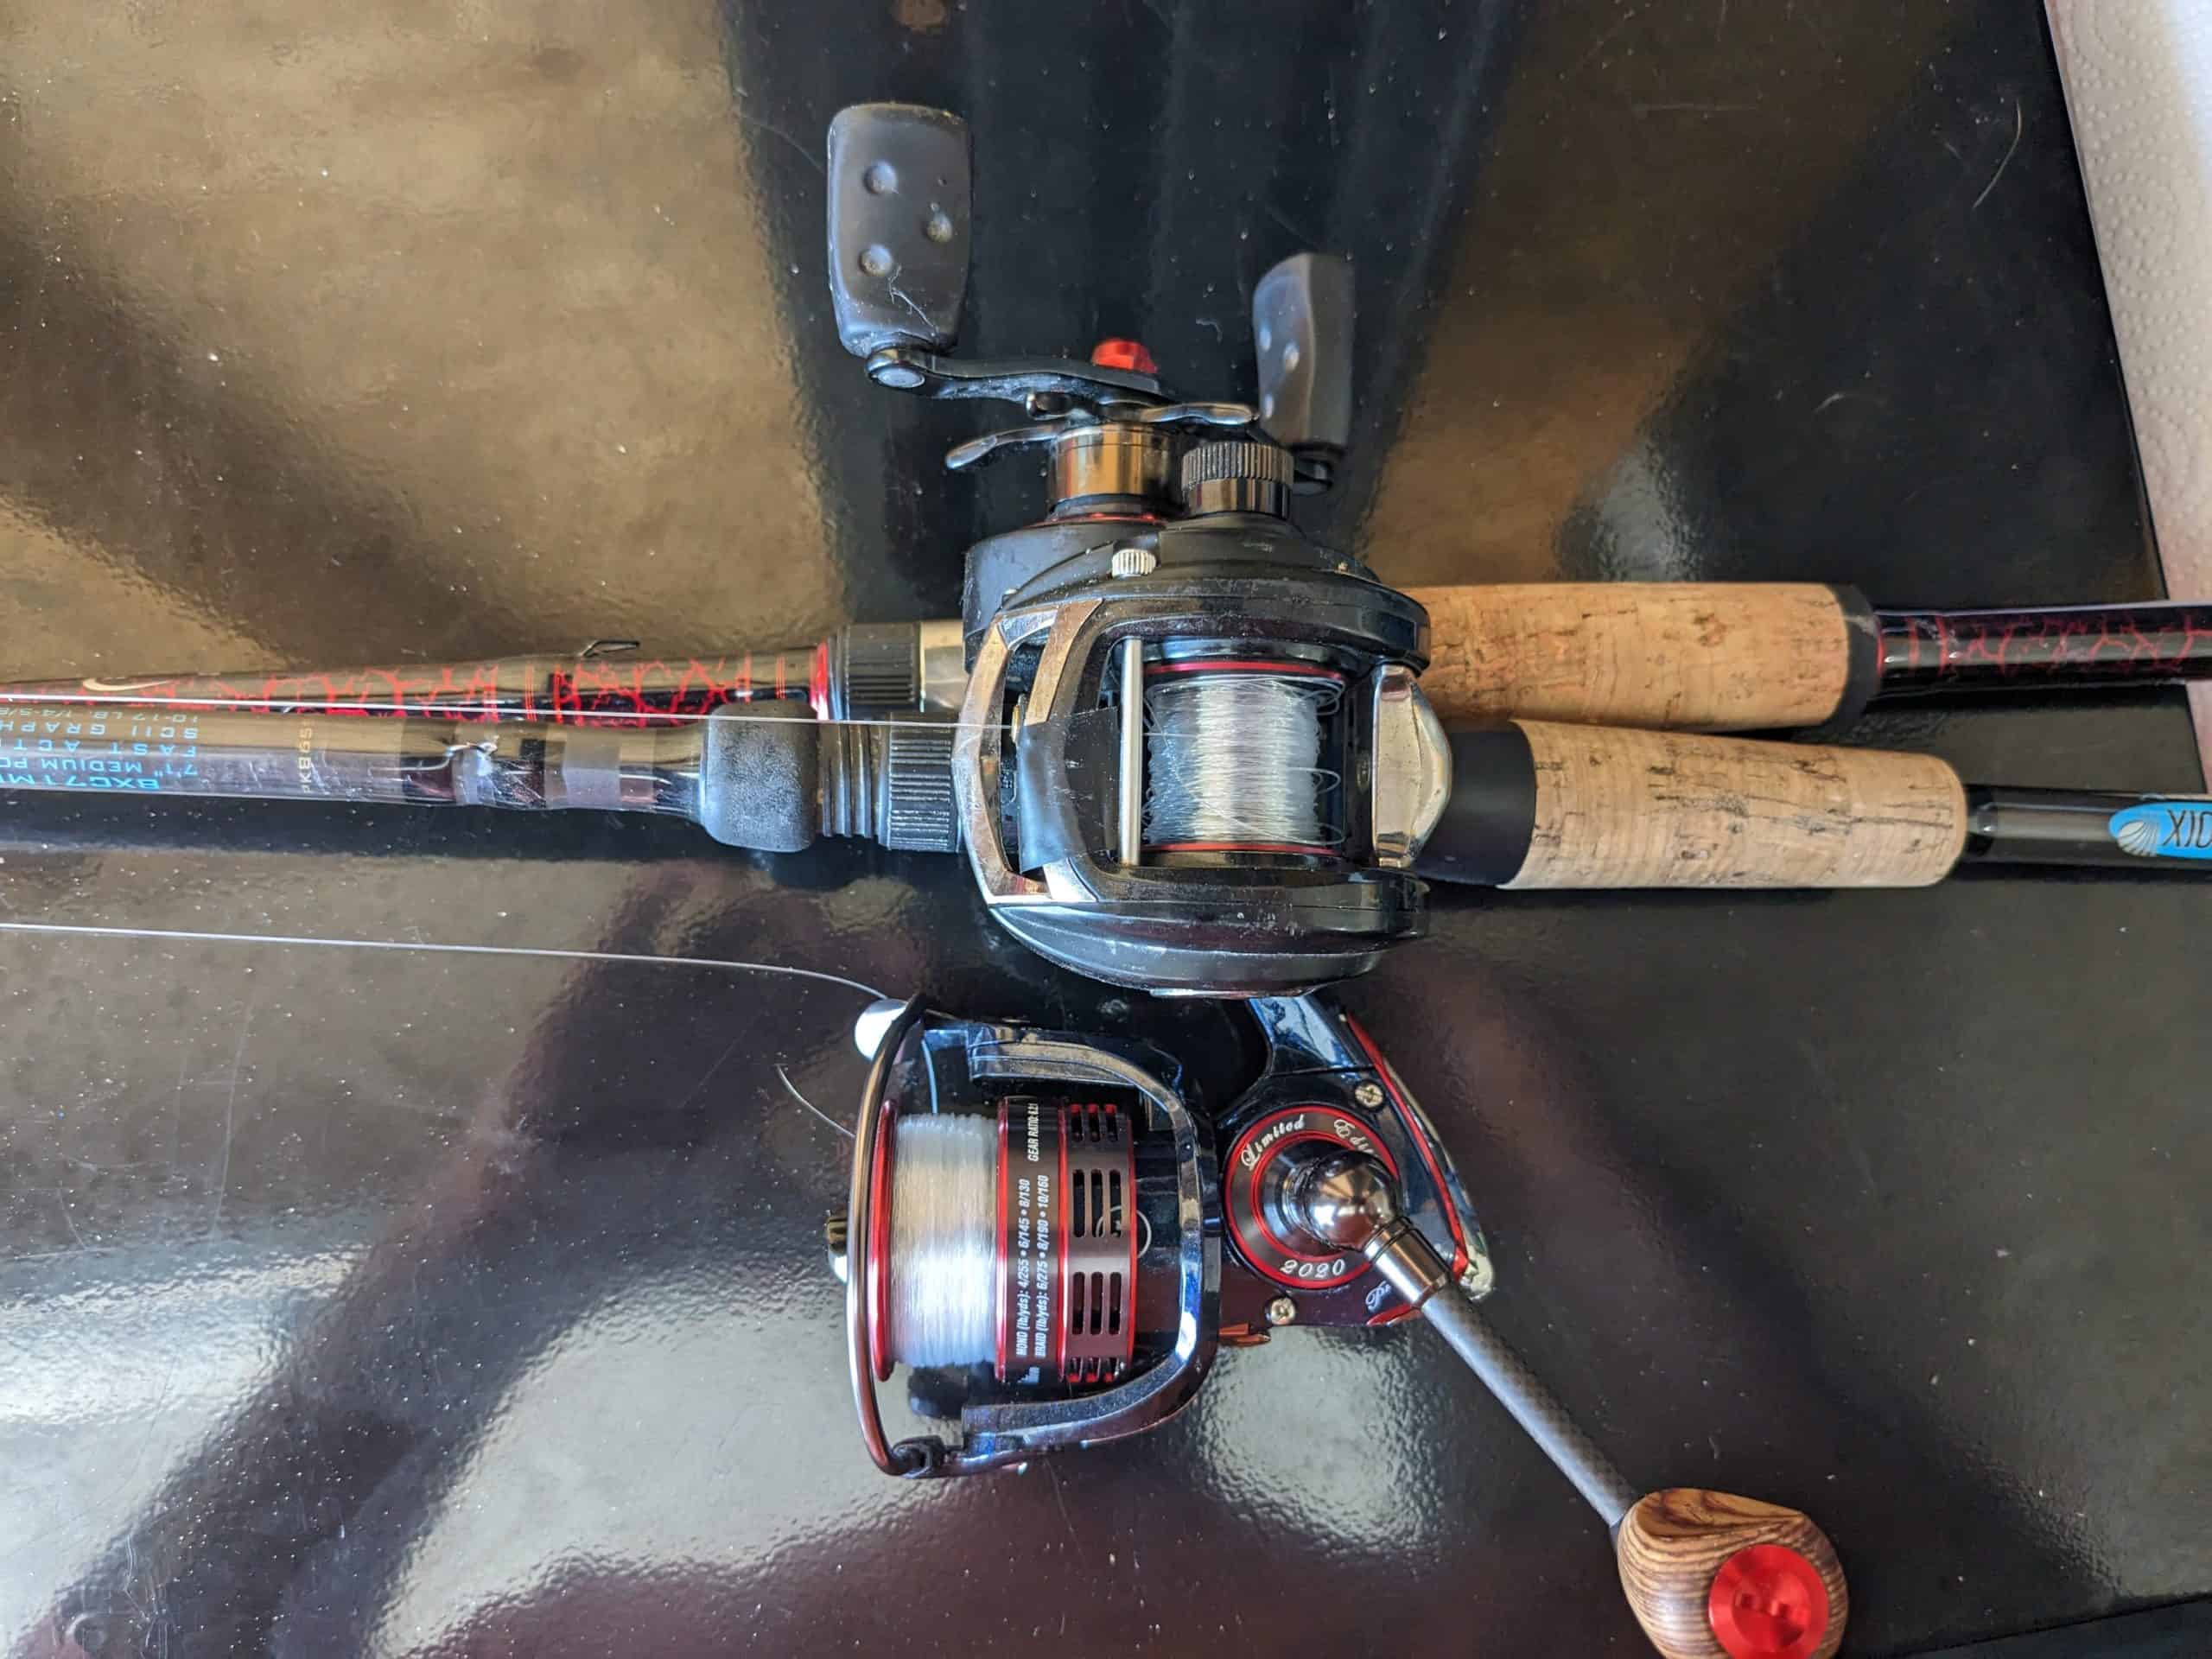
- Rod: A medium power, fast action spinning rod of 6’6″ to 7′ length is ideal for standard wacky rigging. This offers the best balance of casting distance, accuracy, and fish-fighting power. A lot of folks, including myself, also like to fish a wacky rig on a baitcaster. The premise is the same, a medium power, fast action rod in the 7′ range should do the trick nicely.
- Reel: Pair your rod with a 2000 to 3000 series spinning reel. It should have a smooth drag system to handle hard-fighting bass. For a baitcaster, I recommend using a 6-7 gear ratio reel, and you should be set.
- Line: A braided to fluorocarbon leader is a very popular option for fishing a wacky rig, as it pairs the sensitivity of braid and the near invisible properties of fluorocarbon. If you are on a budget, I also regularly fish it on monofilament and still have great success. For either mono or fluoro options, I like to opt somewhere in the 12-17lb range, depending on your body of water.
- Hooks:
- Standard wacky rig: This involves hooking a worm-style bait in the middle with a circle or wide gap hook. I personally prefer buying actual wacky rig hooks, as I seem to have a better hook-up ratio and gut hook less fish. I am not a loyal hook enthusiast by any means, and typically buy what’s on sale at the time. However, I can definitely recommend VMC hooks, for both wacky rigging and just a general brand that produces awesome tackle.
- Weighted wacky rig: The only difference here is that the hook itself is weighted to allow for a faster sinking rate to get down to some fish that may be a bit deeper. There are several decent options around for weighted hooks, so I would give several a go and find your favorite.
- Neko rig: While the Neko rig is a spinoff of the wacky rig, this allows you to fish deeper water and target schools. Admittedly, I haven’t done much Neko fishing in my time. For an awesome video on this method, check out Tim Little as he created an in-depth guide that should get you well on your way.
Budget-Friendly Brands for Wacky Rig Fishing
Wacky rigging doesn’t need to be an expensive affair. Several popular brands offer excellent products at budget-friendly prices:
- Yamamoto Senko: These lures are well-loved by bass anglers and are the Rolls Royce of stick worms. They offer a great action and a variety of colors to adapt to different water conditions. Beware, Senko’s aren’t durable. you are paying for that slight difference in action. But to not add them in any post talking about wacky rigging would be a disservice to the fishing lords.
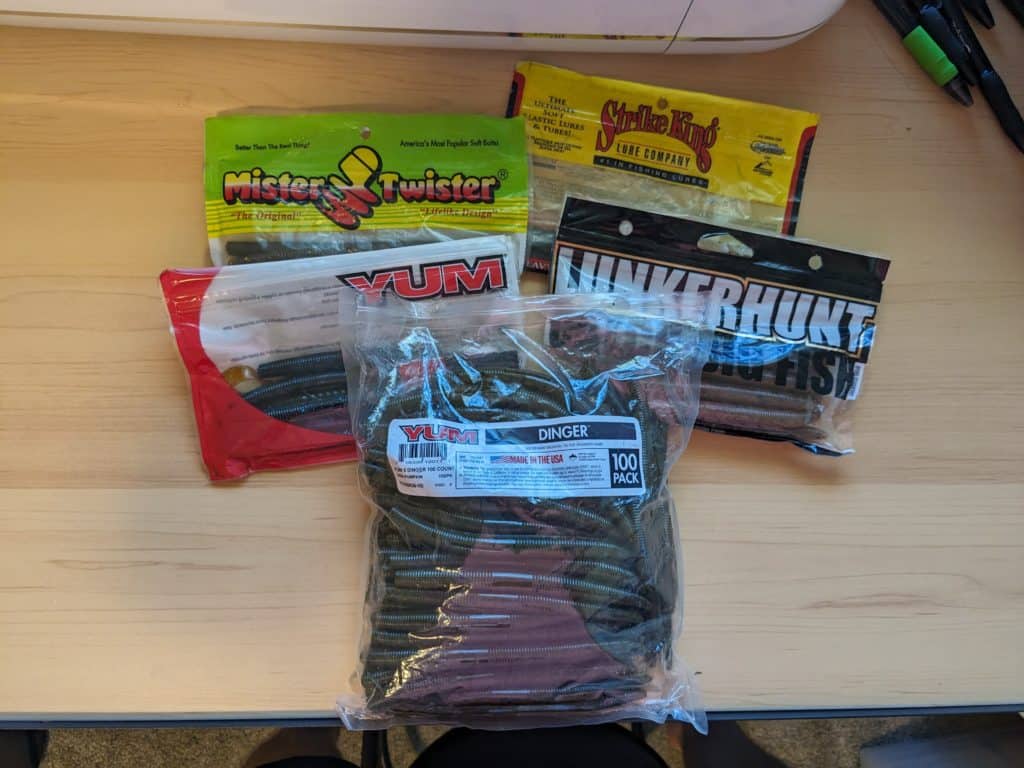
- Yum Dinger: This is my personal favorite stick worm. They are as durable as the competitors, have great colorways, and they even sell them in bulk bags of 100. That in my opinion is a steal, and I very much recommend buying a large pack as they won’t disappoint.
- Bass Pro Shops Stick O’s: These affordable worms perform excellently and come in a spectrum of colors to suit any condition, much like their competitors. I often see Stick O’s on sale both online and in-store at Cabela’s/Bass Pro. Wait for the sales and buy several packs.
- Links to buy:
While these are just a few options, I think dang near every fishing lure manufacturer makes their own version of stick worms. I suggest buying different packs on sale and finding your favorites. If I am being honest, I have well over ten different versions of stick baits from different manufacturers in every color possible (see above photo for what I just had sitting in my closet).However, I am almost always picking up a green or black/blue Yum Dinger and letting the rest collect dust…oops.
In conclusion, the wacky rig is a dynamic and cost-effective technique that should find its place in any angler’s toolkit. With the right timing, setup, gear, and budget-friendly supplies, you’re well on your way to upping your bass fishing game. Send me an email after you have a 50+ fish day and the most wicked bass thumb you’ve ever had after trying a wacky rig.
Tight lines,
Dawson
